

New: Automatically label data points in line charts
September 18th, 2024
3 min
This article is brought to you by Datawrapper, a data visualization tool for creating charts, maps, and tables. Learn more.
Our locator maps just turned half a year old. Lots of you gave us really positive feedback in the last months. Thank you so much! Today, we made our locator maps a little bit better again. We’re happy to introduce lines that connect your markers and texts – also called callout lines, swoopy arrows, annotation lines, leader lines or connector lines. You know, these ones:

Up until today, you had to place your marker text close to a marker or location to make clear that they belong together. With callout lines, you can give them some space. Your label doesn’t need to be glued to the marker anymore.
How can you add callout lines to your Datawrapper locator maps? Simple: Click on a marker, then “more options” and enable “Draw line between marker and marker text”:
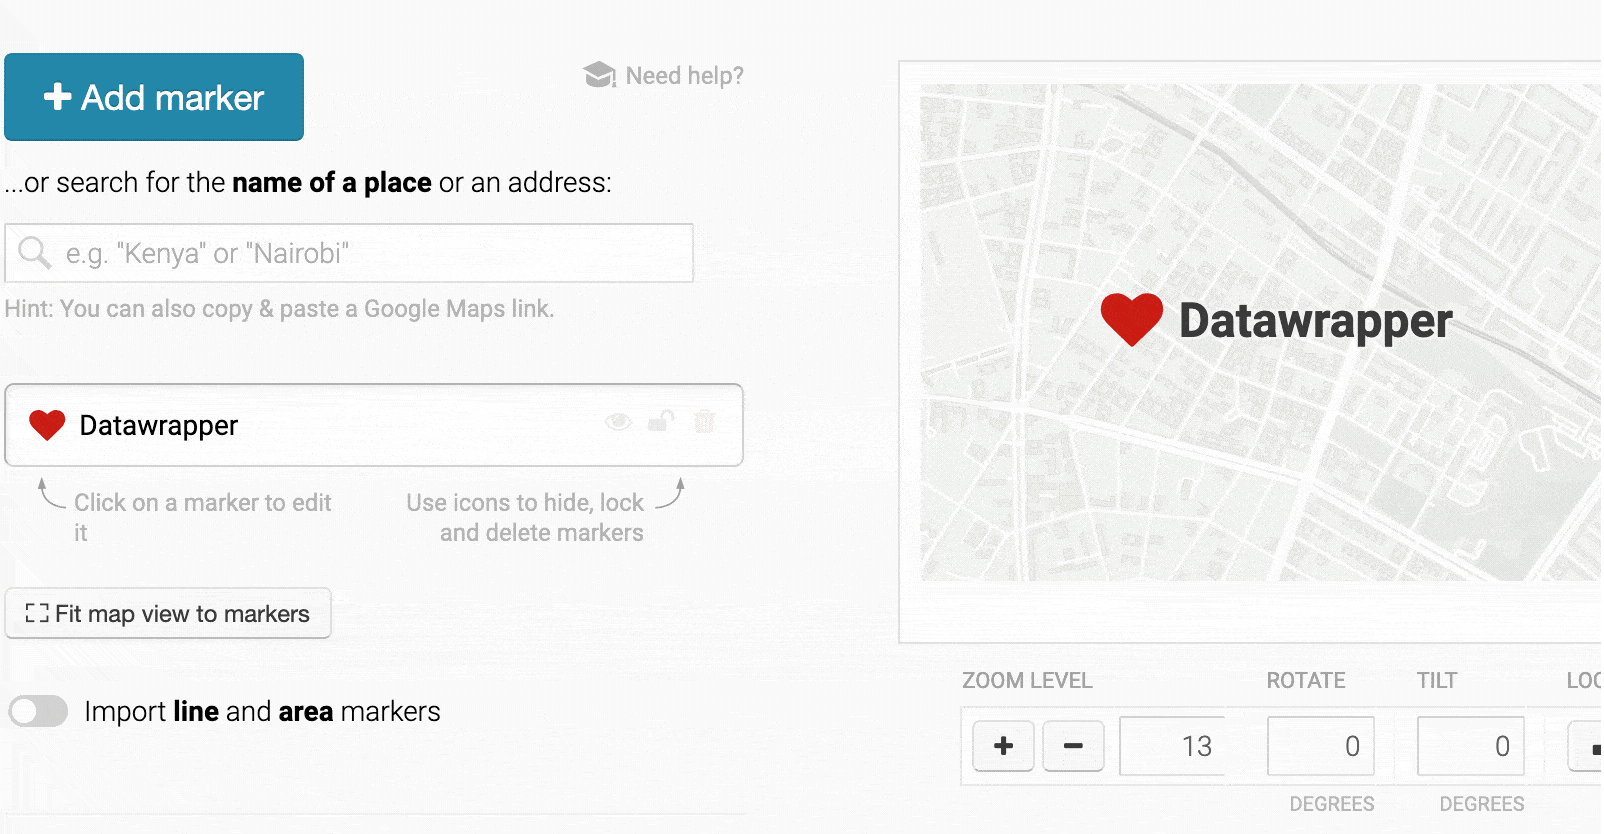
You can then drag the text around (no need to hold Shift anymore while doing so!) and play with the line settings until you’re happy with the result.
You will find our new callout lines useful to help lead your readers’ eyes to important locations and make your map more easy to understand. Let’s take a look at some some specific use cases from some great newspapers and our own locator maps:
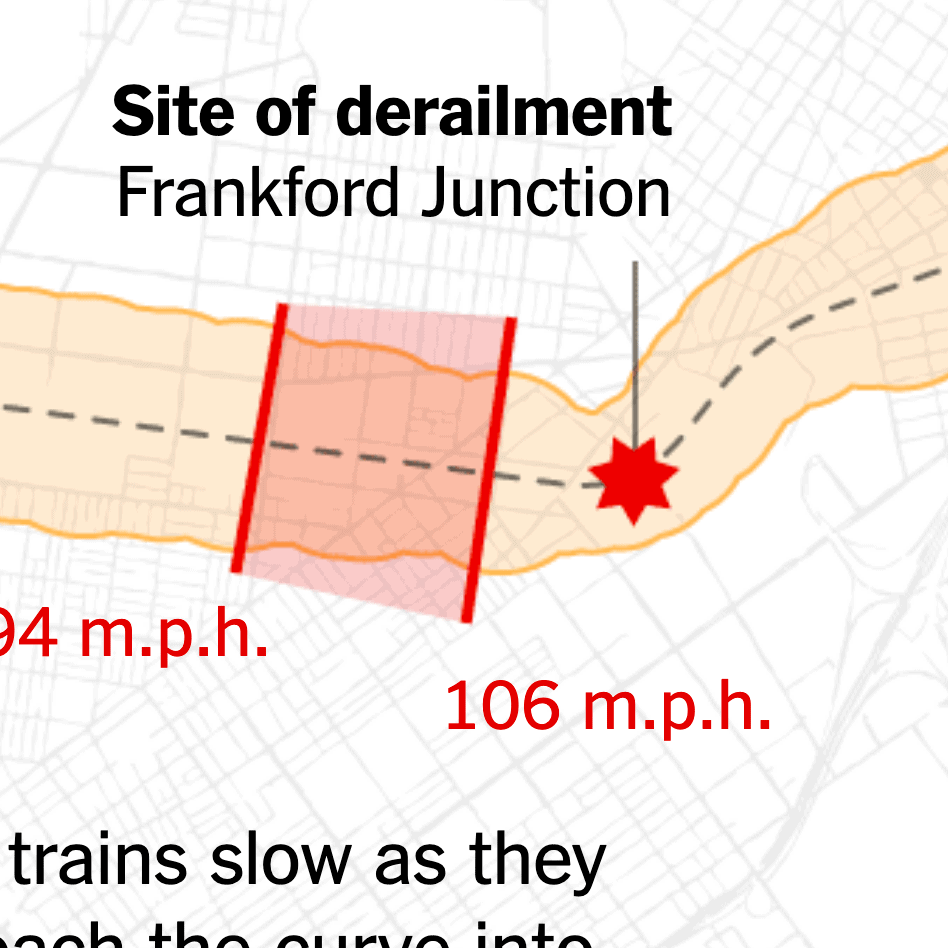
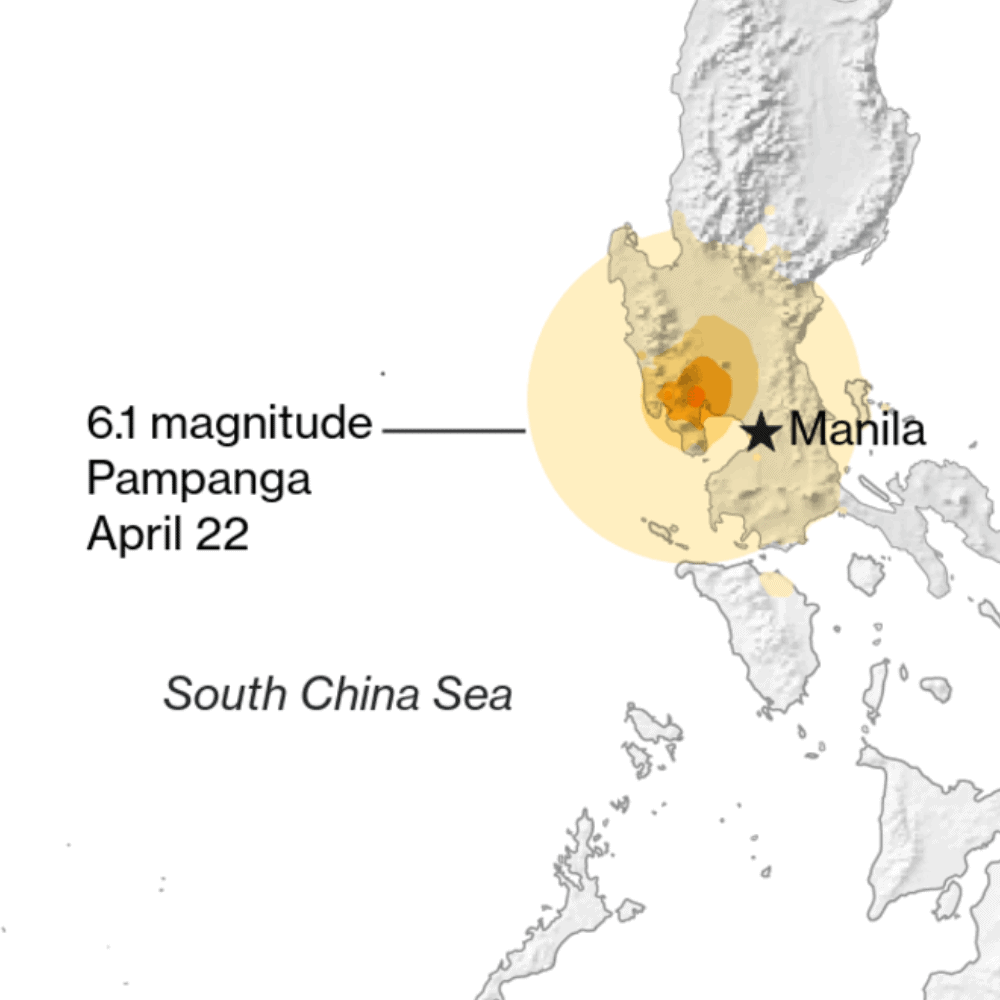
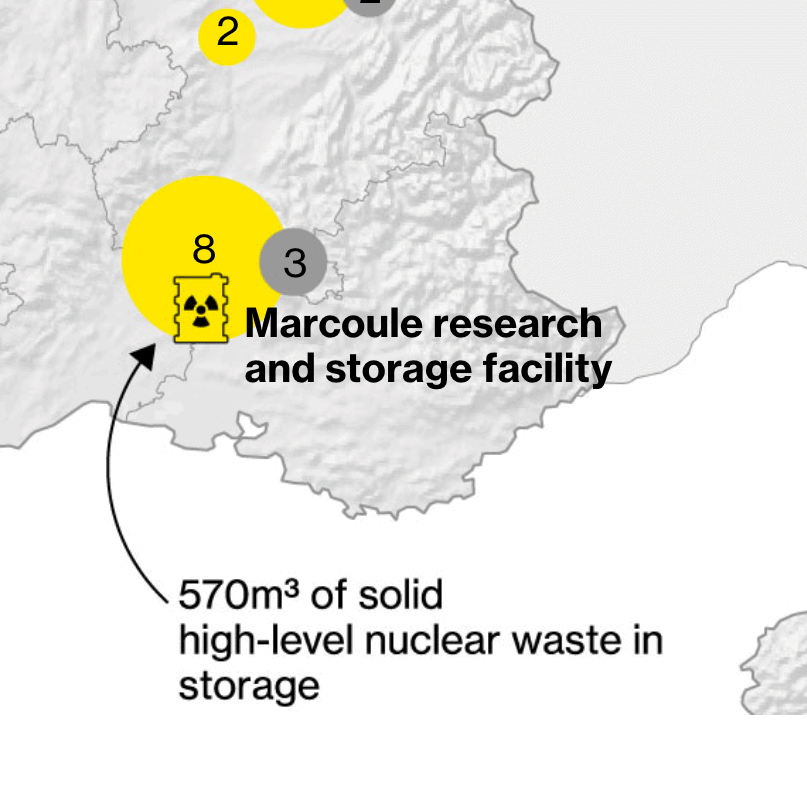
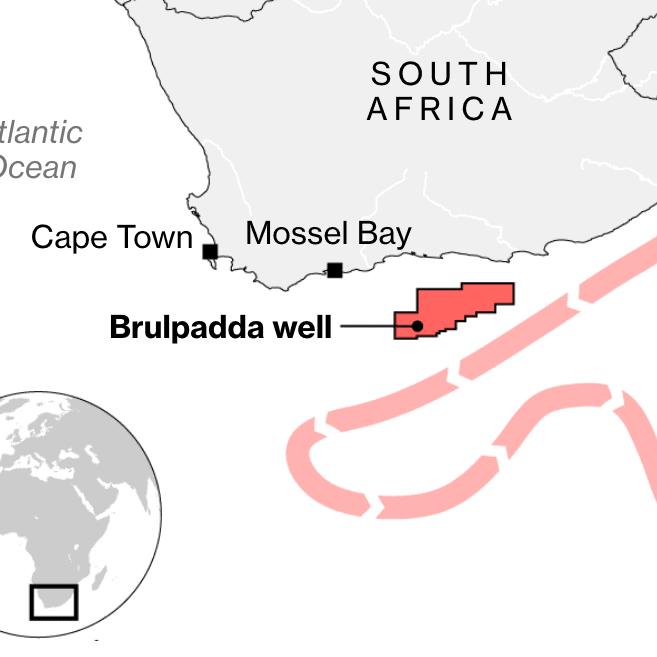
Sometimes there’s a lot going on on your maps. Callout lines come in handy when there’s not enough space to label markers or locations directly. But you can also think of callout lines as a tool to go big: Point the arrow to the most important location in a crammed space, then label it a bit outside of the mess with a bigger font, a highlight color and some whitespace. Your reader’s eye will be drawn to that label and will follow the line to the marked element.

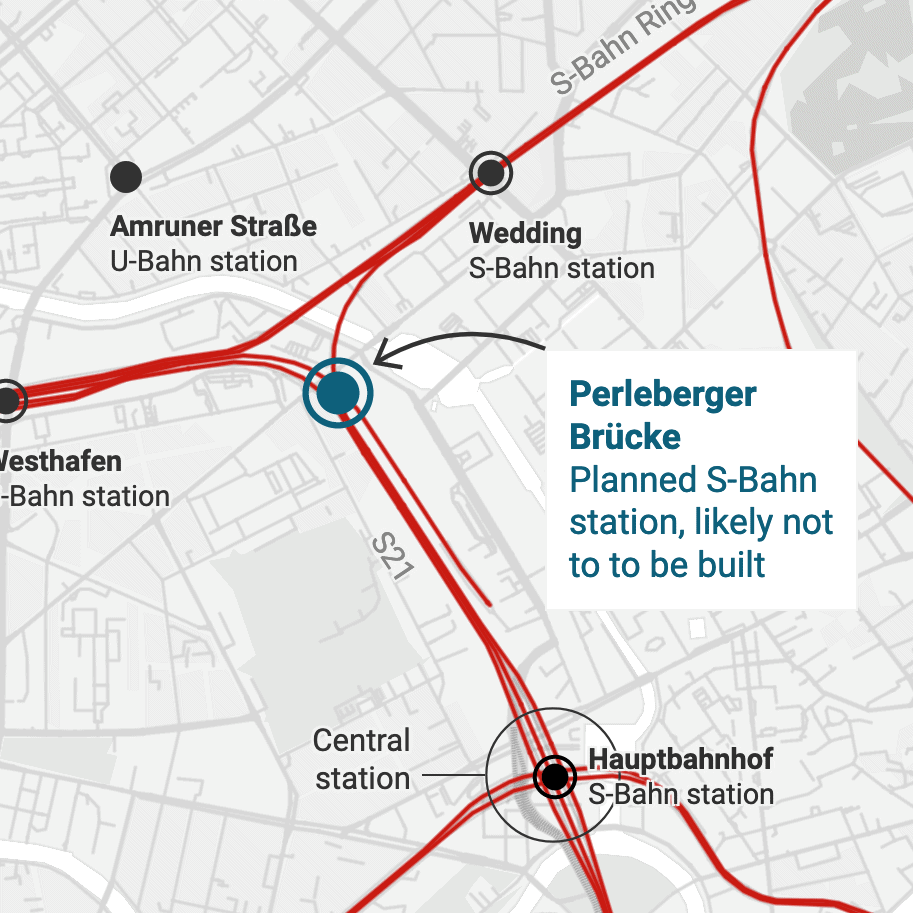
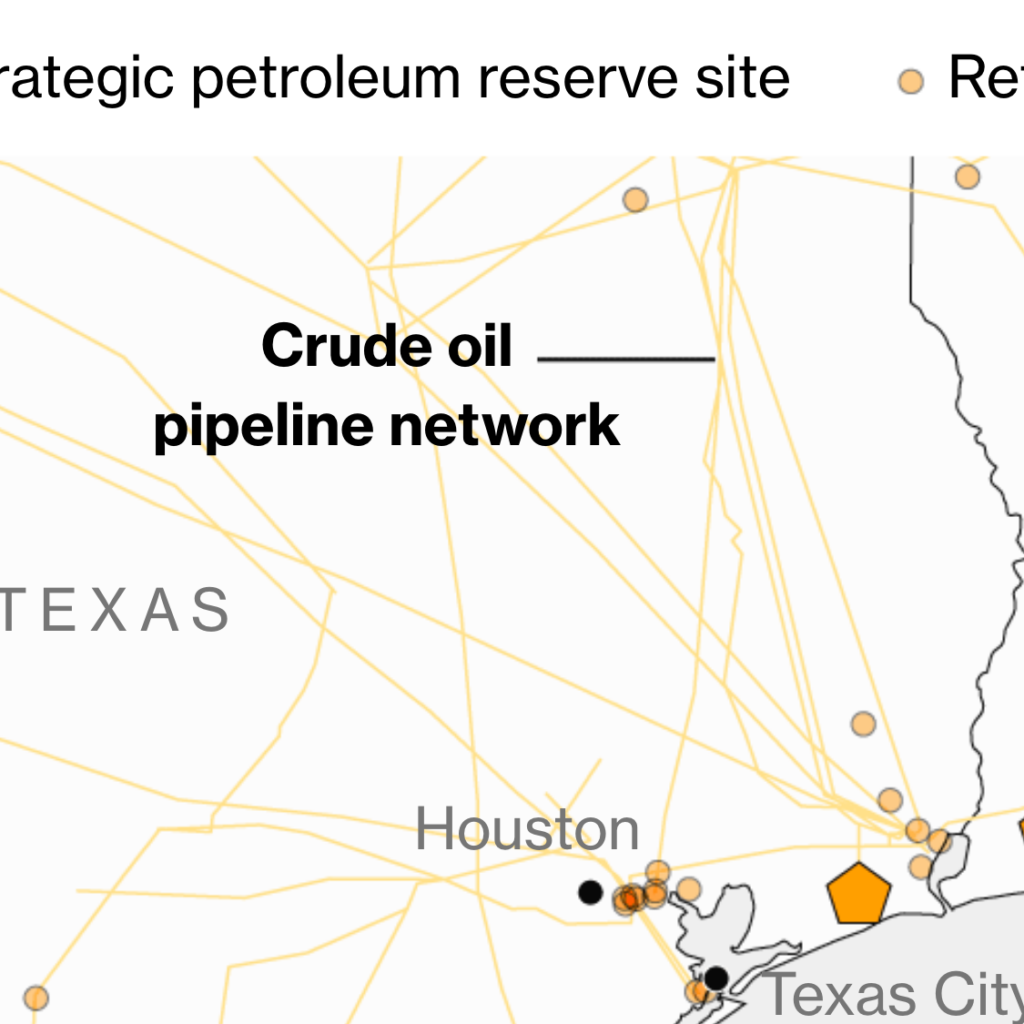
If you position the label in a calmer area of your map, you can make use of the whitespace there to add helpful information. Often, a map becomes easier to understand if you explain locations and their importance in detail. As a side effect, annotations will signal to your readers that these are points they should pay attention to.
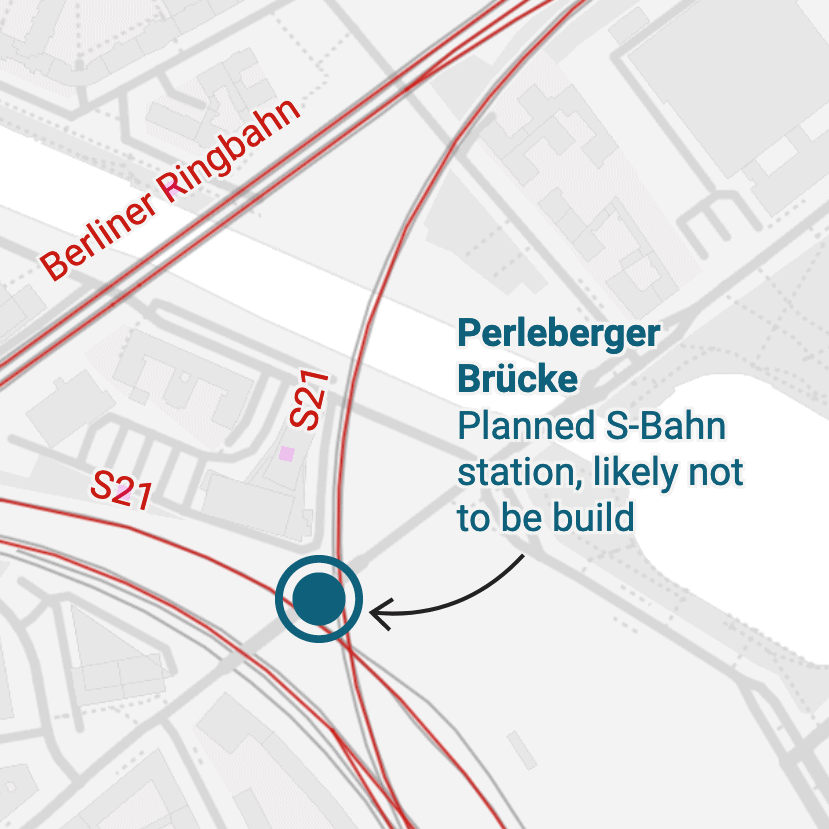
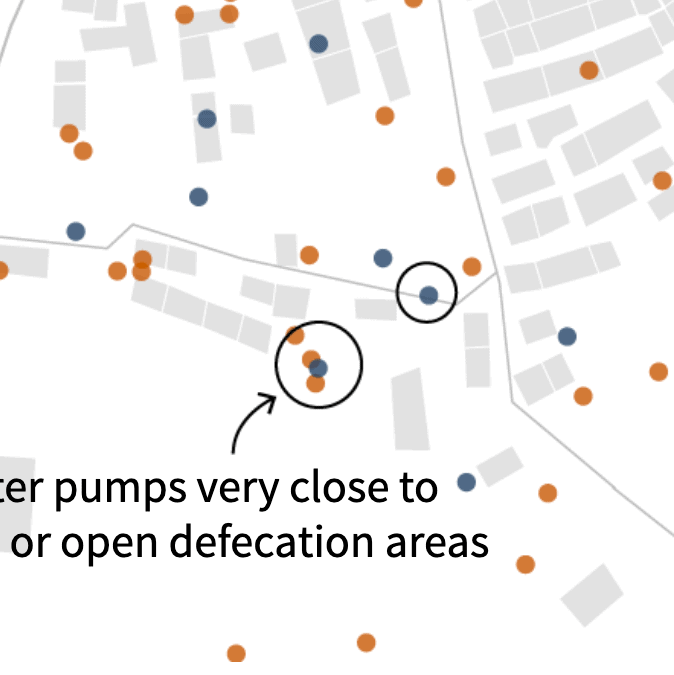
Sometimes, adding a big marker would cover the very thing you want to show. If that’s the case, you can instead choose the big circle ◯ to frame your locations, or skip the marker altogether by selecting the dashed circle ◌ from the symbol selector. To then ensure that users get what you’re talking about, use a callout line.

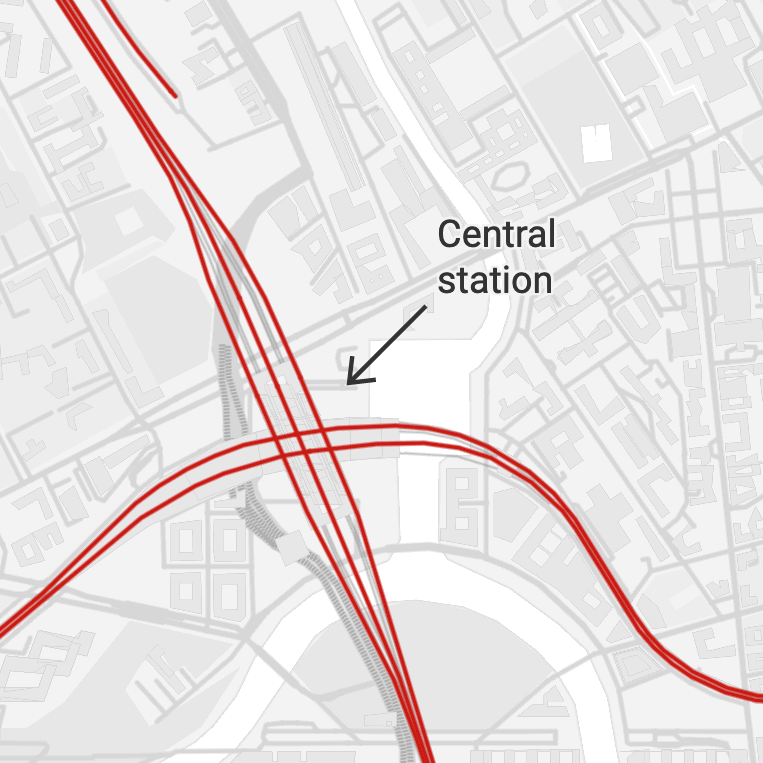
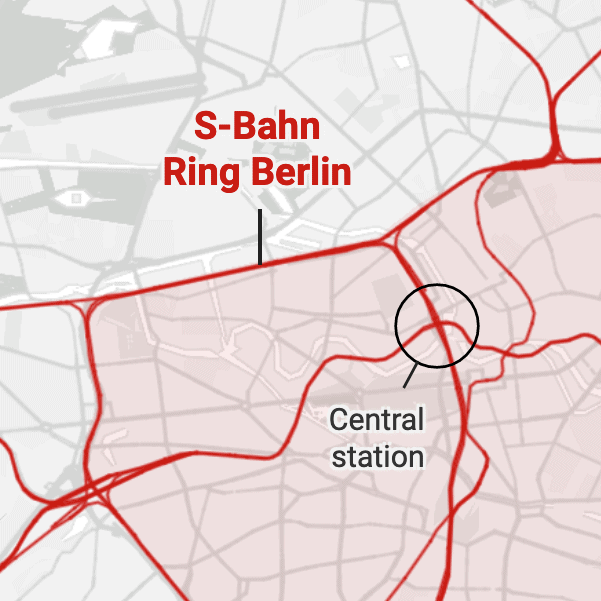
It’s easy to to be clear about what a point marker is showing. It’s harder to do the same for areas and lines: Are they streets? Parks? Or something else entirely? Use callout lines to create a direct connection between the area/line and your marker text, to make it as clear as possible what you’re talking about: “This is the S-Bahn Ring. Not the line next to it. This line.”
Like with all of our features, we put a lot of thought into our locator maps. You can picture our locator map expert Hans and our CTO Gregor in front of whiteboards, discussing for hours: How swoopy should the lines be? What should the default distance to the symbols be? What should the default behaviors be?
A result of this thought process is our straight callout lines: They have the built-in tendency to be in 90° or 45° angle.
This way, your lines will always be in a 90° angle if you want them to – not 91° or 89°, but exactly 90°. Especially if you have a lot of callout lines, consistent use of 45° and 90° looks tidier. Harry Beck knew that, too. He was the designer of the schematic subway maps that show only 45° & 90° angles we’re used to these days. But we don’t want to be quite as limiting as Beck: It’s still possible to create straight callout lines in our locator maps with different angles.
We hope you like our new callout lines – but as always, do let us know if you have feedback, suggestions or questions. We’re looking forward to hearing from you at support@datawrapper.de.


Comments