This article is brought to you by Datawrapper, a data visualization tool for creating charts, maps, and tables. Learn more.
Game of Life

Hi, this is Ivan – I’m a developer here at Datawrapper. After David’s delicious Weekly Chart about seasonal fruit last time around, this week I have something a little more abstract for you.
I recently stumbled upon a YouTube video about how in maths not everything that is true can be proven. The video is as mind-boggling as it is fascinating. Among other mathematical ideas, the video mentions Conway’s Game of Life. Devised by the British mathematician John Conway in 1970, Game of Life uses an initial state to simulate cell evolution in a two-dimensional space. I had read about it before and started wondering: is it possible to use Datawrapper to create Game of Life? Turns out that it is, although it involves a bit of coding and using the Datawrapper API.
The animation above is an animated GIF and not a Datawrapper visualization as such, however each of the steps in the animation is a Datawrapper table! I’ll explain how I created it step by step.
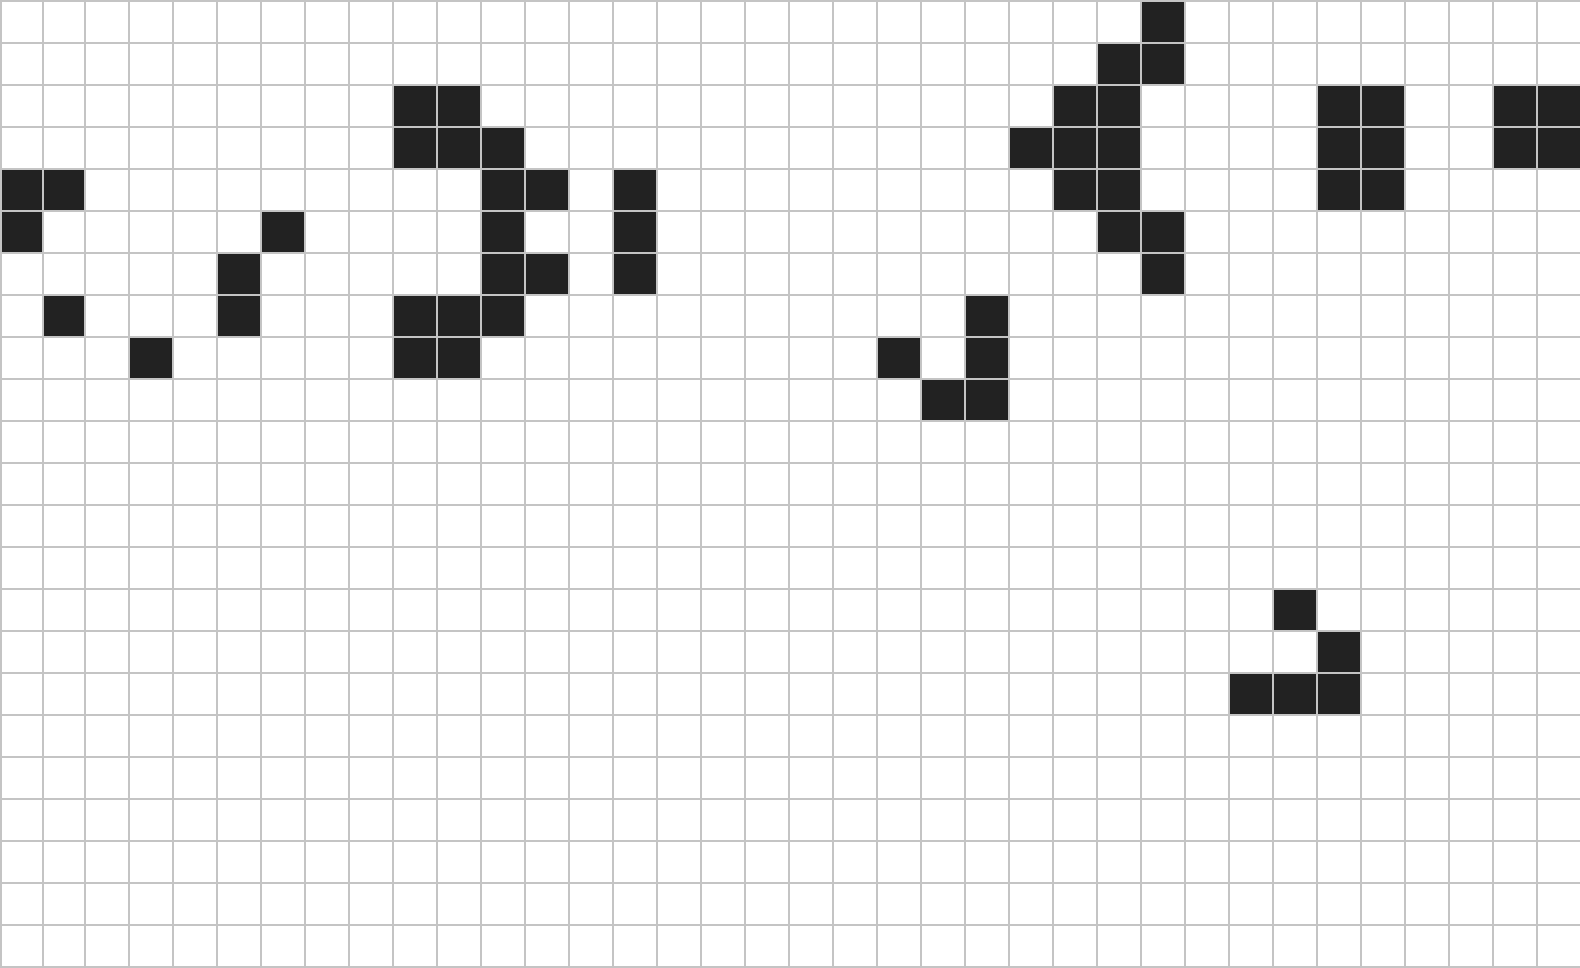
Using a table for the grid
I’ll go into the details of Game of Life in the next step, but first I want to show why I chose a Datawrapper table for visualizing the data. I experimented a bit with different chart types and quickly settled on using a table. A table works well because it consists of rows and columns that represent the two-dimensional grid of Game of Life. Each cell in the grid can have a value of either 0 (for a dead cell) or 1 (for a live cell). To visually communicate this I used the heatmap[1] feature and assigned white color to represent dead cells and black for live cells. I also hid the cell values to complete the cell grid effect.
I used the “Gosper glider gun” cell pattern, which I think results in a fun animation. Here is the initial state of my Game of Life as a Datawrapper table:
Game rules
After figuring out how to display cells in a table, I worked on creating data to be used in each step of the animation. To figure out how cells in each step should evolve, here is an overview of the rules that govern the game:
There are no players in Game of Life: it plays itself after the initial state has been set. For each step in the game, whether a cell is live or dead is determined by the following rules:
- any live cell with two or three live neighbors survives
- any dead cell with three live neighbors becomes a live cell
- all other live cells die in the next generation. All other dead cells stay dead
To calculate cell distribution for each step, I wrote a script that takes in an initial state and total number of steps desired and outputs a CSV file with data for each step. These CSV files can be used in Datawrapper to create a table to visualize each step. The script includes an implementation of the rules outlined above, however my algorithm is very basic and is most likely inefficient at dealing with large datasets — it worked fine for my purpose though. I won't go over the script in detail, but here it is in full in case you're interested.
Getting images using Datawrapper API
The next stage after getting data files was to use Datawrapper to create a table to visualize each step. I had 80 steps in total that I wanted to show, which sounded like a lot of manual work. The best way to deal with repetitive tasks is to use an API to automate the process. Luckily the Datawrapper API provides all necessary endpoints to interact with charts!
My initial idea was to create a separate table for each step but I realized that this is not actually necessary. Instead I created a single table by hand and then used the API to update data in it and export images one by one.
I wrote another script, which takes care of this: it takes in all CSV files from the previous step and for each step uploads the data and immediately triggers an image export. After running the script I had an image for each of the 80 steps.
Creating the animation
Finally, I combined all images together to create the animation. I used the command convert from a command line program called Imagemagick to make the GIF:
convert -delay 10 -loop 0 step-*.png game-of-life-loop.gif
To be specific, from the 80 images that I had, I used numbers 51 to 80 to create the animation. I did this to create the loop effect which is eventually produced from the initial state — this loop starts at step 51.
Here is what the animation looks like starting from first step to step 80 (not looped this time):
That's all from me! I hope you enjoyed this adventure into Game of Life. Let me know if you have any questions or comments below, over at ivan@datawrapper.de or on Twitter. We'll see you next week!
- My colleague Hendrik used a similar technique in his Weekly Chart a few months ago. ↩︎


Comments